#18 Strut Hand Change
1. Remove two-piece rivet from strut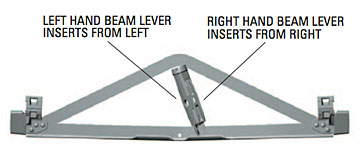
a. Cut off rivet collar
b. Remove rivet pin
2. Remove the strut
a. Tap the strut near the rivet end to rotate it sideways until the "crown" end of the strut is free of the tension member
3. Reverse the strut to the opposite hand
4. Install the strut in the beam
a. With the strut rotated approximately 30°, place the crown of the strut over the tension member
b. Hit the strut near the rivet end to rotate the strut until the holes line up
c. Rivet in place using one of the following
i. Huck: Pin LC-2R20G, Collar 3LC-2R20G
ii. 5/8" grade 5 bolt and hex nut, 120-125 ft-lbs, tack weld nut to bolt or peen bolt to prevent nut from loosening